
WordPress is easy to use, making it an excellent choice for newbies and advanced users. One function that will offer you more control over your material is advanced customized fields in WordPress.
One function that will supply you with more control over your material is customized fields. Utilizing custom areas, you can include structured information to improve your posts and pages. If you desire an even much more accessible user interface with more choices to have custom fields for your WordPress website, then you can utilize the Advanced Custom Fields (ACF) plugin.
In this post, we’ll cover the integrated performance of WordPress custom fields and the popular ACF plugin. Do not hesitate to utilize the following dive links to browse the short article or scroll:
- WordPress Custom Fields
- Advanced Custom Fields Plugin
- How to Use Advanced Custom Fields
- Equate the Custom Fields
WordPress Custom Fields
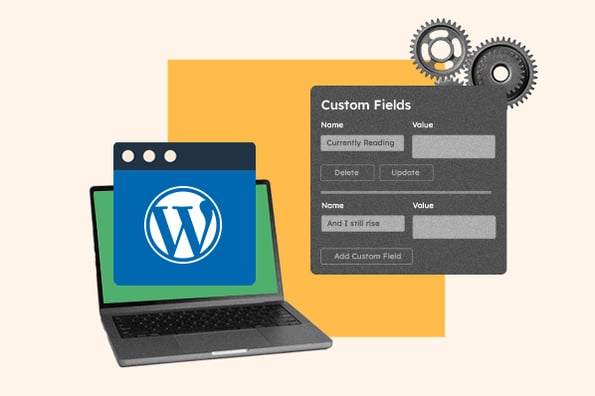
WordPress customized fields can be appointed to a post or page to supply approximate additional info called metadata. Metadata is managed with key/value sets, in which the secret is the Name of the metadata component, and the worth is the details that will appear in the metadata list on the Post.
Below are some examples of WordPress custom fields:
- State of mind: Inspired
- Presently Reading: And Still, I Rise
- Listening To: Calm Down
- Weather Condition: Partly Cloudy
If you’d like to include this kind of structured information in your posts and pages, look at the procedure for customized fields in your WordPress control panel listed below.
How to Use Custom Fields in WordPress
Below is how to utilize custom fields in WordPress for the first time. The procedure will differ somewhat if you or another user has employed custom areas on a WordPress site.
- Visit your WordPress control panel.
- Browse to a post or page. You can produce a brand-new one or modify an existing one.
- Click the three dots button at the top of the best sidebar.
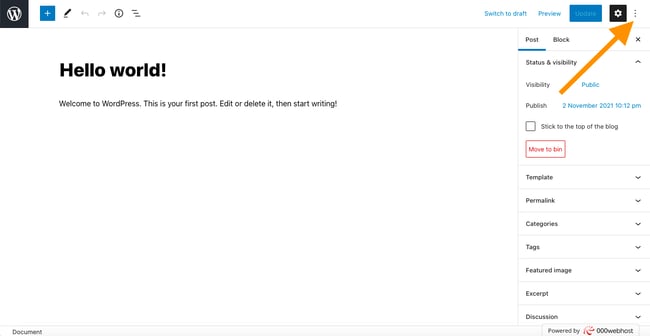
- Scroll down and click Preferences
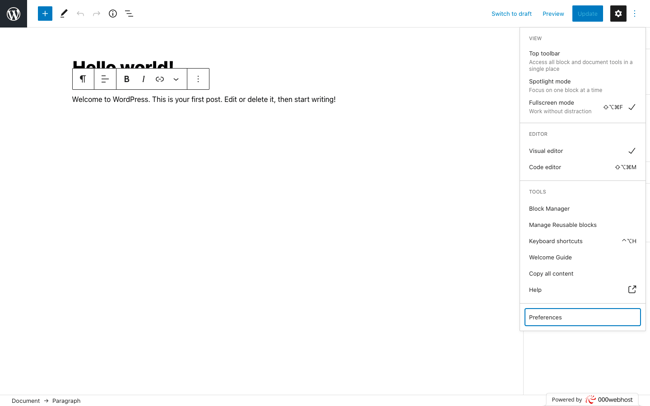
- A brand-new window will appear. Click Panels

- Toggle the button for Custom Fields. This will instantly refill the page.

- Now scroll down to the bottom of the Post to the area identified Custom Fields.
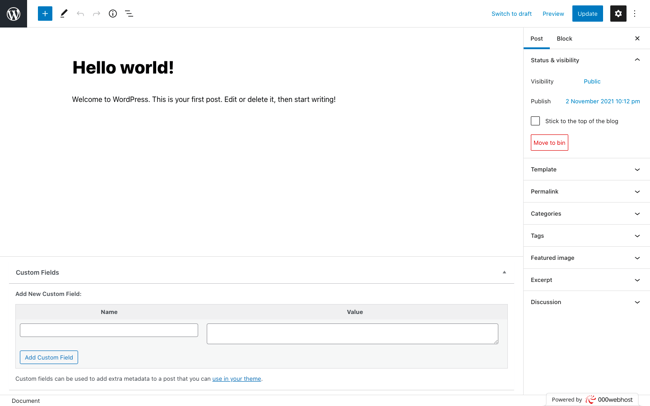
- To produce a brand-new Custom Field, fill in the text entry field entitled Name. This will be the “secret.”
- Now complete the text entry field entitled Value. This will be the worth designated to the secret.

- Click the Include Custom Field button to conserve this metadata for that Post.
- You can continue including custom fields. When you’re all set, click Update.

- You will see the Custom Fields area if you produce or modify another post or page. The Name, or Key, field will now be a drop-down list including the formerly gotten in Custom Fields.

While this procedure is easy, it’s not easy to use or versatile. For these factors, lots of users choose to utilize the Advanced Custom Fields plugin over the native custom fields performance in WordPress.
Listed below, let’s take a more detailed look at what this WordPress plugin can do and how to utilize it.
Advanced Custom Fields Plugin
Advanced Custom Fields, or ACF, is a plugin created to give WordPress designers more control over their custom-made field information. The free variation permits users to rapidly and quickly include 30+ fields all over your WordPress control panel– consisting of posts, users, taxonomy terms, media, remarks, and customized alternatives pages– and show the custom field worth in any style design template file.
Supported field types consist of text (the only type supported natively in WordPress), variety, button group, checkbox, choose, true/false, color picker, date picker, time picker, link, and more. That implies you have more control over your customized fields with ACF than WordPress’s integrated performance.
Advanced Custom Fields Pro
Advanced Custom Fields Pro is the premium variation of ACF. It uses more fields, performance, and versatility than the complimentary variation. Here are the professional functions listed below:
Repeater Field
With this field, you can produce a set of subfields that can be duplicated once again and once again.

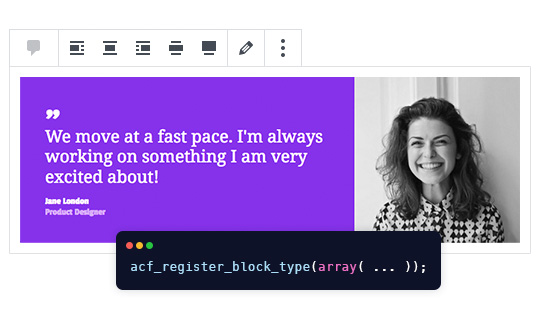
ACF Blocks
Utilizing this effective PHP-based structure, you can establish customized block types for the Gutenberg Editor.
Versatile Content Field
This field offers several design and sub-field choices that you can utilize to specify, develop, and handle material.

Gallery Field
With this field, you can construct customizable image galleries.

Clone Field
Utilizing this field, you can recycle existing fields and groups to handle field settings more effectively.

Alternatives Page Feature
With this function, you can include custom-made admin pages to modify ACF fields.

To comprehend how to utilize the Advanced Custom Fields plugin, we’ll explore how to develop and show custom fields on your WordPress posts listed below.
How to Use Advanced Custom Fields
- Develop a field group.
- Include customized fields for that group.
- Edit fields in the WordPress post editor.
- Show fields on the front end of your website.
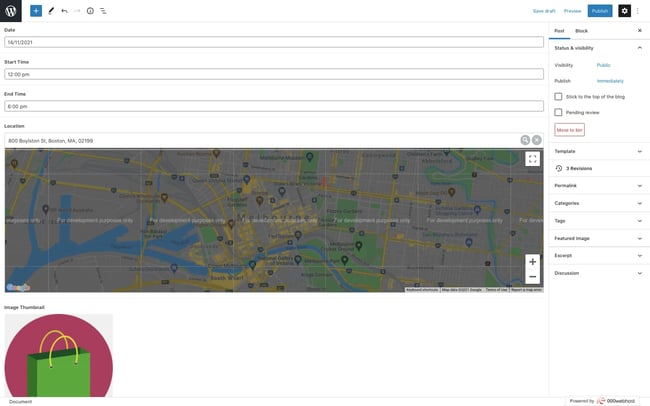
For example, let’s state you run an ecommerce site and utilize your blog to promote pop-up occasions. With each article, you wish to share an occasion:
-
-
-
-
-
-
-
-
-
-
-
-
- Date
- Start Time
- End Time
- Area
- Image Thumbnail
-
-
-
-
-
-
-
-
-
-
-
To do so, you’ll need to include five custom fields. Let’s stroll through the procedure listed below.
Action 1: Create a field group.
To begin, click Custom-made Fields > Include New from your admin screen. Offer this group a name in the title box.
Avoid to Location where you can choose which modified screens will utilize this group of custom fields. For this example, you wish to reveal this field group on all posts, so develop a guideline stating, “Show this field group if Post Type amounts to Post.”

Now avoid down to Settings, where you can choose the design, position, label positioning, guideline positioning, and more of your field group.

Action 2: Add customized fields to that group.
Now it’s time to include the custom fields that will comprise this field group and appear when modifying a post.
For each of the five fields you wish to include, click the +Add Field button, fill in the field label, Name, and type a minimum of.

As soon as you finish these actions for a date, begin time, end time, area, and image thumbnail custom fields, then click ReleaseThe page will immediately re-load.

Action 3: Edit fields in the WordPress post editor.
Now that the field group has been released and set to appear on Post modify screens, you can change the field worths by browsing to Posts > Include NewIn this screen, fill in a value for each custom field.
When you’re done making modifications, click Release
These details will now be kept in your database. It will not appear on the front end of your website. See how the Post seems if you click Preview Changes:

Step 4: Display fields on the front end of your website.
To show Advanced Custom Fields information on the front end of your website, you can modify your style’s design template files or utilize a shortcode. Changing a design template file needs some technical understanding. However, it’s the most reliable and scalable method to show ACF information. Using a shortcode is a more straightforward technique; however far more manual. You’ll need to include a shortcode to every Post that you wish to show ACF information on the front end.
For these factors, we will stroll through the procedure of modifying your style’s design template file to show custom fields on the front end of your website.
Depending upon the area you set for your field group and your style, you’ll either modify the single.php or single-[$ post_type]php file or utilize design template parts or filters to personalize the HTML of your WordPress posts so they show custom fields on the front-end.
This example sets the place of the occasion field group to all posts; then you’ll modify the single.php design template and include the following code: