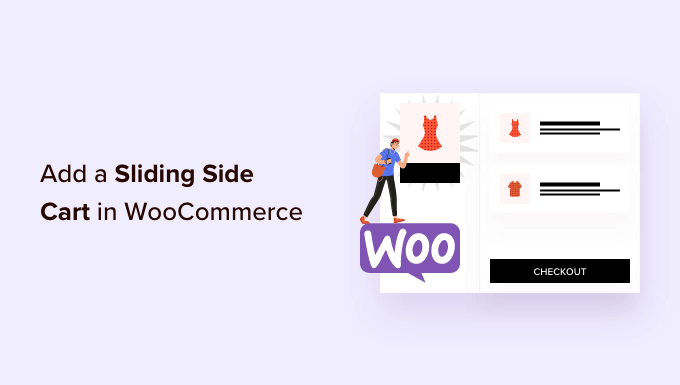
Do you want to include a moving side cart in WooCommerce?
This enables consumers to see their shopping cart from any page on your online shop. Consumers can then include products to their basket, eliminate items, and include discount coupons without ever needing to go to a different cart page.
In this short article, we will reveal how quickly you can include a moving cart in WooCommerce.
Why Add a Sliding Side Cart in WooCommerce?
A moving side cart is a panel that appears when a consumer includes a product in their basket.
Clients can likewise open the cart at any time by clicking the cart icon. This enables them to inspect their shopping basket without needing to check out a different WooCommerce cart page.

Depending upon how the cart is established, consumers might likewise have the ability to include and eliminate products in addition to using vouchers straight from the moving panel. You can even include call-to-action buttons like a link to your WooCommerce checkout page.
Moving carts can enhance the client experience by getting rid of friction from the shopping procedure, and assist buyers monitor just how much they’ll pay at checkout. This can lower cart desertion rates, perhaps increasing the typical order worth.
With that being stated, let’s see how you can include a moving side cart in WooCommerce. Merely utilize the fast links listed below to leap directly to the technique you wish to use.
- Technique 1. How to Add a Sliding Side Cart in WooCommerce Using a Free Plugin
- Technique 2. Include an Advanced Sliding Side Cart (With Upsells, Cross-Sells, and Rewards)
Approach 1. How to Add a Sliding Side Cart in WooCommerce Using a Free Plugin
The quickest and most convenient method to develop a moving side cart is by utilizing Cart For WooCommerce By FunnelKitThis totally free plugin enables you to include a cart icon to your online shop.
Buyers can click the button to open the moving side cart.
You can alter the cart’s colors, borders, buttons, messaging, and more.
There are a lots of choices to make it completely fit your WordPress style.

You can reveal the cart button throughout your whole website, limit it to WooCommerce pages just, or include the switch to particular pages and posts utilizing a shortcode.
How to Setup the Cart For WooCommerce Plugin
You’ll require to set up and trigger the FunnelKit Cart for WooCommerce plugin. If you need assistance, please see our guide on setting up a WordPress plugin.
Upon activation, go to FunnelKit” CartYou’ll see a sneak peek of the moving slide cart towards the right of the screen.

You can now tailor the cart to much better match your requirements.
To begin, you can choose whether to reveal the cart icon throughout your whole site or on WooCommerce pages just.
If you pick ‘Entire Site’, then buyers can open the moving cart from any page, so this is an excellent option for online markets and shops.

Some WooCommerce websites have lots of non-ecommerce material. You may run a popular WordPress blog site, however utilize WooCommerce to offer products to your fans.
Revealing a cart button on each and every single post might end up being bothersome. Because case, you can examine the ‘WooCommerce Pages’ radio button.

Another choice is ‘None,’ which conceals the cart icon totally.
If you choose the ‘None’ choice, then you can include the icon on any page, post, or widget-ready location utilizing a shortcode. You can likewise have the icon in your navigation menu.
We’ll reveal to you how to do this later on in the post, however for now, choose ‘None’ if you prepare to include the cart icon by hand.
After making this choice, choose ‘Bottom Left’ or ‘Bottom Right’ depending upon where you wish to reveal the cart button. Here, it might assist in inspecting how the button will search your online shop by choosing ‘Preview on Page.’

By default, the plugin reveals ‘Review Your Cart’ at the top of the moving side cart.
You can change this with your messaging by typing into the ‘Cart Heading’ field.

If you do not wish to reveal a heading, then just leave the field empty.
By default, FunnelKit reveals the cart icon prior to the buyer including any products in their basket.
If you choose, then you can conceal the icon up until the visitor begins including products. Merely click the ‘Hide Cart Icon’ toggle so that it turns blue.

This is all you require to produce a standard moving side cart, however, there are settings that can get you a lot more sales. With that in mind, let’s have a look at FunnelKit’s advanced functions.
Accept Coupons in the WooCommerce Sliding Side Cart
Vouchers are an excellent method to get more sales and develop client commitment.
If you’ve produced any wise WooCommerce vouchers utilizing the Advanced Coupons plugin, then buyers can type them straight into the moving cart page.

When the consumer clicks ‘Apply,’ the moving cart will demonstrate how much they’ve conserved.
Because clients can see the discount rate quickly, this will motivate them to include more products in their basket and might decrease your cart desertion rates.

You can produce these codes utilizing the integrated WooCommerce discount coupon function or by using a discount coupon code plugin.
To include the discount coupon field, click the ‘Enable Coupon Box’ toggle, which turns it from grey (handicapped) to blue (made it possible for).

After that, you can change between ‘Minimized’ and ‘Expanded’ designs. Reduced uses up less area so it’s less disruptive, however, consumers will require to broaden the voucher area prior to they can enter any codes.
In the following image, you can see the reduced design.

After picking a design, you can alter the text that FunnelKit utilizes for the voucher box heading, discount rate placeholder text, and button text.
Tailor the Cart Summary
The cart summary reveals to clients just how much their purchase will cost. This helps in reducing cart desertion rates given that there are no nasty surprises at checkout.

Because of that, we advise leaving the ‘Show Subtotal’ toggle allowed.
If you desire to streamline the side cart, then you can click to disable the ‘Show Subtotal’ toggle.

You can likewise reveal any cost savings the client has gotten approved for, consisting of discount rates from any discount coupons they’ve used.
In this method, you can utilize FOMO to increase conversions, specifically if the cost savings are time-sensitive. You may arrange discount coupons in WooCommerce so the consumer can utilize them for a limited time.

If you choose to conceal this info from the moving side cart, then you can disable the ‘Display Savings’ toggle.
You can likewise change the ‘Saving Text’ and ‘Shipping Text’ with your customized messaging.

Personalize the WooCommerce Cart’s Call To Action
The moving side cart has a default checkout button, however, you can personalize this call to action button to get more conversions. To begin, you can include a checkout icon utilizing the ‘Enable Button Icon’ toggle.
This can be especially beneficial if you’re developing a multilingual WordPress website.
You can likewise include the cart rate to the checkout button utilizing the ‘Enable Cart Price’ toggle.

This might assist consumers to keep an eye on just how much the cart will cost, mainly if you’ve gotten rid of the subtotal from the cart summary area.
By default, FunnelKit includes a ‘Continue Shopping’ link at the bottom of the moving side cart. You can change this text with your messaging by typing into the ‘Continue Shopping Text’ field.

After that, pick whether this link will just close the side cart panel or reroute the consumer to your WooCommerce shop page.
Many consumers will anticipate leaving the moving cart, so we advise picking the ‘Close Side Cart’ button.

If you pick ‘Redirect to Shop,’ then you might wish to alter the ‘Continue Shopping Text’ text so it’s clear what will occur when consumers click the link.
Develop a Custom Empty Cart Screen
It is possible to conceal the cart button up until the consumer includes a minimum of one product to their basket, following the procedure explained above.
If you do not conceal the button, then clients might in some cases see an empty cart screen.

You can alter the title, description, and button text utilizing the settings in the ‘Em pty Cart’ area. Usually, you’ll wish to motivate consumers to begin shopping. You may talk about things you provide such as complimentary shipping or money-back assurance.
You may even offer the buyer a discount coupon code such as a buy one get one complimentary (BOGO) discount rate.

You can likewise pick whether clicking the ‘Shop Now’ button will take the consumer to the WooCommerce shop page or close the side panel.
We advise choosing ‘Redirect To Shop’ as this will make it simpler for consumers to begin including products in their carts.

Include The Cart Icon Anywhere on your Site
If you desire more control over where the cart icon appears, then you can include it in any page, post, or widget-ready location utilizing a shortcode. You can likewise have it on your website’s menu.
This is a fantastic option if you choose ‘None’ in the ‘Icon Visibility’ settings following the procedure explained above.

If you chose ‘WooCommerce Pages,’ this technique permits you to include the cart icon in other crucial locations of your website. You may consist of the icon to your custom-made house page or contact kind.
To begin, choose ‘Cart Menu’ and then click the ‘Enable Cart Menu’ toggle.

You can now alter how the icon looks by picking one of the icon design templates, and picking whether to reveal the item count and cart amount as part of the icon. This info can assist visitors to track their carts.
You can likewise alter the icon size and text size. As you make modifications, the little sneak peek will upgrade immediately so you can attempt various settings to see what looks the very best.

When you’re delighted with how the moving side cart icon looks, click the ‘Save’ button.
You can now include the icon to any page, post, or widget-ready location utilizing the code beside ‘Em bed Shortcode.’
To find out more on how to position the shortcode, please see our guide on including a shortcode in WordPress.
Another choice is to include the icon in your website’s navigation menu. In this method, the moving side cart is constantly within simple reach, without sidetracking from the primary page material.
To do this, open the ‘Add to Menu’ dropdown and pick the menu you wish to utilize.
After that, click the ‘Save’ button.

If you visit your WordPress site, you’ll see the cart icon in the navigation menu.
Include Your Colors and Branding
You might wish to alter the moving side cart’s colors to match your WooCommerce style or branding. To change the text color, button color, link color, and more, proceed and click ‘Styling.’

To alter any of the default colors, provide it with a click. This opens a popup where you can experiment with various colors.
In the following image, we’re tailoring the border.

Another choice is to type a hex code into the ‘Hex’ field. This is ideal if you currently have a particular shade in mind.
If you do not understand what hex code to utilize, then it might assist to use a website like HTML Color CodesHere, you can check out various colors and, after that, get a code that you can just paste into the FunnelKit plugin.
How to Create a Responsive Sliding Side Cart
Lots of people purchase products or services utilizing a mobile phone. With that in mind, you’ll wish to make sure the moving side cart looks simply as great on mobile phones and tablets, as it does on a home computer.
Here, it might assist in altering the cart’s width so it does not fill the little screen of a mobile phone. To do this, click ‘Styling’ and after that, take a look at the ‘Cart Preview Mobile Width.’

You might wish to attempt typing various worths into this field. If you alter the default settings, it’s an excellent concept to examine the mobile variation of your WordPress website from the desktop to ensure you’re pleased with the outcomes.
While on this screen, you can likewise alter the width of the moving side cart on the desktop. To do this, merely change the number in the ‘Cart Preview Desktop Width’ field.
How To Publish Your Sliding Side Cart
When you’re delighted with how the moving side cart is established, it’s time to make it live. Merely click the ‘Draft’ button beside ‘Cart’ and then select ‘Publish.’

If you visit your online shop, you’ll see the moving cart live.
If you wish to get rid of the moving side cart at any point, then head back to FunnelKit” Cart in the WordPress control panel. Click on the ‘Publish’ button and choose ‘Draft.’
Technique 2. Include an Advanced Sliding Side Cart (With Upsells, Cross-Sells, and Rewards)
If you wish to increase the standard order worth on your shop, then you can update to FunnelKit Cart Pro. This sophisticated moving side cart plugin includes effective upselling, cross-selling, and benefits functions for the FunnelKit moving side cart.
With this plugin, you can advise associated items whenever a client includes a product in their cart.

You can likewise produce distinct benefits such as discount coupon codes and complimentary presents, and after that, promote them inside the moving cart.
FunnelKit can even track just how much more the consumer requires to invest to open the next benefit.

To include these practical functions, you must update to FunnelKit Funnel Builder Pro. Know that you’ll require the Plus or Greater strategy.
After purchasing a strategy, log into your FunnelKit account. Here, you’ll discover the FunnelKit Funnel Builder Pro plugin, plus FunnelKit Funnel Builder and FunnelKit Cart. You’ll require to set up all three plugins to open the innovative moving cart functions.
You’ll require to set up and trigger the three plugins. If you need aid, please see our guide on setting up a WordPress plugin.
Upon activation, go to FunnelKit” Settings and include your license secret to the ‘FunnelKit Funnel Builder Pro field.

You can discover these details by logging into your account on the FunnelKit site. With that done, click ‘Activate.’
After that, go to FunnelKit” Cart

You can now set up and tailor the side cart by following the very same procedure explained in Approach 1. When you’re pleased with how the moving side cart is established, you’re all set to include upsells, cross-sells, and benefits.
Get More Sales By Upselling and Cross-Selling WooCommerce Products
When a client opens the moving side cart, you can reveal distinct upsell and cross-sell promos based on the products in their shopping basket.

Upselling is where you motivate consumers to purchase a higher-priced item instead of the one they currently have in their shopping cart.
Think of a client including a water-resistant coat in their cart. You may recommend a higher-quality coat that’s more resilient, flexible, and in various colors.
Cross-selling is where you promote an item that’s associated with something the client is currently purchasing. If they include a welcoming card in their cart, you may motivate them to buy chocolates or flowers too.
WooCommerce actually has a connected item function that permits you to produce upsells and cross-sells. For more details, please see our guide on how to upsell items in WooCommerce.
You can likewise produce upsells and cross-sells straight from the FunnelKit control panel. This is the quickest alternative, so it’s the one we’ll be utilizing in this guide.
To begin, click the ‘Upsells’ choice, and after that, choose ‘Enable Cart Upsells.’

After that, scroll to the ‘Upsells and Cross-Sells’ area.
Here, you’ll see all the items in your online shop.

Just click the product where you wish to include several related items.
Click on either ‘Add Upsell’ or ‘Add Cross Sell’ depending on the kind of promo you desire to produce.

In the popup, type the item you wish to utilize as the upsell or cross-sell. When the best thing appears, provide it with a click.
To use several items, merely follow the very same procedure explained above.

With that done, merely click the ‘Add’ button.
You can now produce distinct cross-sell and upsell projects for every item in your shop just by following the same procedure explained above.

Now, you’re ready to personalize how the upsell and cross-sell promos will search your moving side cart.
To begin, attempt changing between various designs by clicking the radio buttons beside ‘Display.’

The live sneak peek will upgrade immediately so you can attempt various designs to see which one you like the very best.
By default, FunnelKit will reveal upsells and cross-sells in the moving side cart. If you choose then you can reveal upsells, or just cross-sells utilizing the radio buttons in ‘Product Recommendation Type.’

Next, you can alter the heading that FunnelKit programs above the upsell or cross-sell promo by typing it into the ‘Heading’ field.
Simply know that FunnelKit will utilize the same heading for both kinds of promo.

Afterward, you can set the optimum variety of recommended items that FunnelKit will reveal by typing into the ‘Show Maximum Upsells’ field.
Wherever possible, it’s an excellent concept to develop distinct upsell and cross-sell promos for every item. If your online shop has lots of products, then this may not be possible.
With that in mind, you can default to upsell items that FunnelKit will promote when no connected items are offered. To do this, type the name of an object into the ‘Default Upsells’ field. When the ideal item appears, provide it with a click.

When you’re delighted with the upsell and cross-sell promos you’ve produced, do not forget to click ‘Save’ to save your modifications.
Deal Free Shipping, Discounts, and Free Gifts
You can typically increase the typical order worth by providing clients with a factor to invest more. With that in mind, FunnelKit enables you to develop numerous benefits and promote them as unlockable perks in the moving side cart.
You may provide free shipping if the client goes beyond a minimum investment. FunnelKit will even reveal to clients how much more they must invest in opening their reward.
This method is simple to get more sales and develop client commitment with gamification.
FunnelKit enables you to provide three various benefits: free shipping, a discount rate, and a complimentary present.
To provide complimentary shipping, you’ll need currently established shipping in your WooCommerce shop. For detailed guidelines, please see our total WooCommerce-made easy guide.
The ‘discount rate’ benefit auto-applies a voucher when the client reaches the minimum investment. If you wish to use this benefit, you must develop a portion discount rate voucher utilizing either the integrated WooCommerce discount coupon function or a WordPress voucher plugin.
For detailed guidelines, please see our guide on how to develop clever discount coupons.
After that, you’re prepared to produce a benefit by picking ‘Rewards’ in the FunnelKit settings and, after that clicking ‘Create Reward.’

You can now open the ‘Type’ dropdown and pick the benefit you wish to produce.
No matter whether you select free present, complimentary shipping, or discount rate, you can alter the text that FunnelKit reveals to clients by typing into the ‘Message’ field.
If you do make any modifications, then take care not to modify {{remaining_amount}} as this permits FunnelKit to demonstrate how a lot more the consumer requires to invest.

If you’re providing a discount rate, then alter the message to illustrate how much the consumer will conserve.
With that done, type a number into the ‘Amount to Get Reward’ field. This is just how much consumers need to invest to open the benefit.

If you’re providing a portion discount rate, you must define which voucher FunnelKit ought to auto-apply.
In the ‘Coupon’ field, begin typing the voucher you wish to use. When the correct code appears, offer it a click.

FunnelKit will auto-apply the discount coupon when somebody fulfills the minimum investment.
Are you providing a complimentary present instead? Begin typing the name of the gift into the ‘Product’ field.

When the best item appears, provide it with a click.
Now, FunnelKit will include this product in the consumer’s shopping cart as quickly as they fulfill the minimum investment.

To include more benefits, merely click ‘Create Another Reward.’
You can now set up the discount rate, totally free present, or free shipping benefit by following the same procedure explained above.

By default, FunnelKit will reveal the following message once a client receives all the awards: ‘Congrats! You have opened all the benefits.’
To reveal various messages instead, merely type into the ‘When All Rewards Unlocked’ field. You may even use the client a unique bonus offer for opening all your benefits, such as a unique voucher code to utilize on their next purchase.

When you’re delighted with how your benefits are established, click the ‘Save’ button.
How To Publish Your Sliding Side Cart
When you’re prepared to make the moving side cart live, pick the ‘Draft’ button beside ‘Cart.’ You can then click ‘Publish.’

If you wish to eliminate the moving side cart at any point, merely head back to FunnelKit” Cart in the WordPress control panel. Click on the ‘Publish’ button and choose ‘Draft.’
We hope this short article assisted you in including a moving side cart in WooCommerce. You might likewise wish to look at our guide on producing a WooCommerce popup to increase sales and the best WooCommerce plugins for your shop.