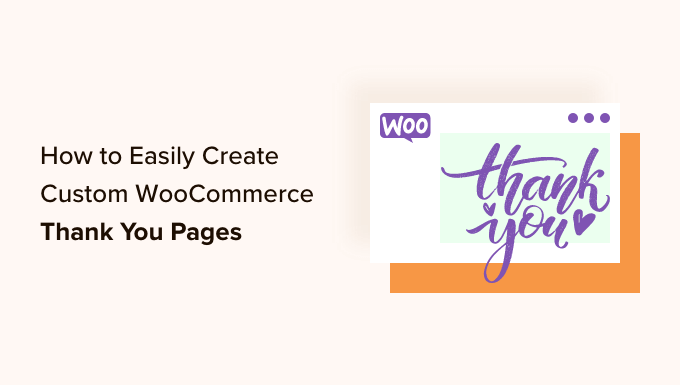
Do you want to create a customized WooCommerce thank you page quickly?
Custom-made order verification is an excellent method to contact your clients and increase sales by promoting associated items or providing a unique discount coupon code.
This short article will show you how to produce a customized WooCommerce thank you page.
Why Customize a WooCommerce Thank You Page in WordPress?
The order verification or thank you page might look like a part of your online shop, but it can be an essential part of the sales procedure.
The default WooCommerce thank you page isn’t enhanced for conversions, so we suggest changing it to a customized page. This page may motivate buyers to purchase more items by providing voucher codes or showing popular items.
You can likewise reveal essential information such as the products bought, the overall expense, and the delivery of information.

With that stated, let’s reveal to you how to develop a customized WooCommerce thank you page, detailed quickly. Merely utilize the links listed below to leap directly to the approach you wish to use.
- Approach 1. Produce a Custom WooCommerce Thank You Page Using FunnelKit
- Technique 2. Produce a Custom WooCommerce Thank You Page Using a Page Builder
Technique 1. Develop a Custom WooCommerce Thank You Page Using FunnelKit
The most convenient method to produce a custom-made WooCommerce thanks you page is using FunnelKitpreviously called WooFunnels. It is the best WordPress sales funnel and automation plugin and includes ready-made Thank You design templates that you can quickly contribute to your online shop.
This enables you to produce professionally-designed and valuable thank-you pages without composing a single line of code.

Keep in mind: There’s likewise a FunnelKit Pro plugin that features more ‘thank you’ design templates. We’ll be utilizing the complimentary variation of FunnelKit as it has whatever you require to change the default WooCommerce thank you page with a custom-made style.
The first thing you must do is set up and trigger the plugin. For more information, see our detailed guide on how to set up a WordPress plugin.
Upon activation, go to FunnelKit” Templates and click the ‘Checkout’ button.

Pick a Thank You Page Template
You can now pick from any of FunnelKit’s ready-made design templates or choose ‘Start from scratch.’ We suggest utilizing a design template as it assists you in quickly producing an expertly created Thank You page.
To take a more detailed look at any design template, hover your mouse over it and then click the ‘Preview’ button when it appears.

FunnelKit will reveal a sneak peek of the checkout page by default.
Choose ‘Thank You Page’ from the left-hand menu to see the thank you development.

When you discover a design template you wish to utilize, click’ Import This Funnel.’
We’re utilizing the Livewire design template in all our images. However, you can use any style you desire.

At this moment, FunnelKit may ask you to set up some additional plugins such as SlingBlockswhich includes page-building functions to the WordPress block editor.
If you see this message, click ‘Activate’ to get the required plugins.

After that, key in a name for the custom-made thanks you page. This is simply for your recommendation so you can utilize anything that will assist you in recognizing the page in your WordPress control panel.
With that done, click the ‘Add’ button.

Personalize Your WooCommerce Thank You Page
You’ll now see all the consistent actions in the design template.
Because you’re utilizing the complimentary variation of FunnelKit, the design template consists of a thank you page and a custom-made WooCommerce checkout page, which you’ll require to establish independently. For in-depth, step-by-step guidelines, please see our guide on tailoring the WooCommerce checkout page.
To proceed and personalize the thank you page, click its ‘Edit’ link.

You can now click ‘Edit Template’ to open the design template in the WordPress block editor.
Keep in mind: If you’re utilizing a page contractor plugin, then FunnelKit might open the design template in various editors. If this occurs, you must click ‘Switch to WordPress editor’ instead of ‘Edit Template.’

You can now tailor the design template in precisely the same method you construct any WordPress page. Just click any block, then tweak it utilizing the settings in the right-hand menu and the mini toolbar.
You’ll typically desire to change the placeholder logo design with your customized plan. To do this, click to pick the Image block, and then choose ‘Replace’ in the mini toolbar.
Now, choose Open Media Library and pick an image from the WordPress media library, or click ‘Upload’ and choose a file from your computer system.
After selecting an image, you can include image alt text, alter the width, including rounded corners, and more, utilizing the settings in the right-hand menu.
Likewise, you’ll wish to change the placeholder text with info about your online market. Click to choose any text block, then enter your customized messaging.
You can likewise alter the text’s styling using the right-hand menu settings. You can use borders and box shadows to make the text stand out, change the font style household, or alter the text color in WordPress.

Do not customize text inside the [ ] brackets; these tags permit FunnelKit to reveal individualized material, such as the client’s name.
Tailor the Order Details Widget
After that, please click the Order Details area and offer it a click. This is a particular widget supplied by FunnelKit that reveals info about the consumer’s order.

This widget works out of the package. However, you might wish to personalize how it looks and the details it reveals.
First, you can alter the area’s heading by typing into the ‘Heading’ field.

You can likewise pick whether to reveal the item image for each product in the client’s order, utilizing the ‘Show Image’ slider.
Do you offer memberships for a subscription website, online courses, or comparable? You might desire to reveal info about the consumer’s membership, such as the cost and when their next payment is due.

To include this area, click to broaden ‘Subscription’ in the right-hand menu. Make it possible for the ‘Show Subscription Preview’ toggle.
In this area, you can change the default ‘Subscription’ text with your messaging by typing into the ‘Heading’ field.

If you offer digital downloads, you can include a ‘Downloads’ area on the thank you page. This includes beneficial info, such as the filename, the variety of downloads staying, and the expiration date.
You can even include a button so consumers can download their purchase straight from the customized thank you page, enhancing the consumer experience.

To include this area, click to broaden ‘Downloads’ in the right-hand menu. You can then have and eliminate details utilizing the toggles.
You can change the default heading and button text with your messaging.

When you’re delighted with how Order Details is established, you might wish to alter how it looks by clicking the ‘Style’ tab.
Here, you can alter the heading and background colors utilized throughout the whole order area or modify specific aspects within the ‘Download’ or ‘Subscription’ areas.

Modify the Customer Details Widget
With that done, it’s time to look at Customer Details, another widget supplied by FunnelKit.
Just click to choose the Customer Details area and make your modifications in the right-hand menu. You can change the default heading with your messaging by typing it into the ‘Heading’ field.

You can likewise change between a multi-column or single-column design utilizing the ‘Layout’ dropdown menu.
After that, you can click the ‘Style’ tab and alter the font styles, text size, colors, and more.
Include More Blocks to the Custom Thank You Page
When you’re pleased with your modifications to the design template, you might wish to include your material. This can assist you in enhancing the consumer experience, getting more sales, promoting your brand name, and more.
To include blocks, click the ‘+’ icon in the right-hand corner, then drag any block onto your style. FunnelKit, WooCommerce, and WordPress have great deals on various blocks you can utilize, so let’s look at a couple of examples.
- Promote Your Other WooCommerce Products
The thank you page might look like the completion of the purchaser journey, but it does not need to be. You can use this page to advise other items the buyer wants, and this can get you more sales, raising awareness about the other excellent things you offer.
Scroll to the ‘WooCommerce’ area in the left-hand menu to see what blocks are offered. Here, you’ll discover blocks such as Best-Selling Products, Newest Products, On-Sale Products, and more.

Discover the block you wish to utilize and drag it into your style.
With that done, click to choose the block, and then personalize it utilizing the settings in the right-hand menu.

- Get More Social Media Followers
Social network sites like Twitter and Facebook are ideal locations to promote your items, so you’ll wish to get as many fans as possible. With that in mind, including social network links to your customized thank you page is a great concept.
Considering that these buyers have purchased from your company, they will likely follow you on Instagram, Snapchat, YouTube, and other social platforms.
To start, merely drag a Social Icons obstruct onto your page. You can then click the ‘+’ icon and select the social icon you wish to include.
After choosing, click the brand-new icon in the Social Icons block.
In the mini toolbar that appears, enter the URL of the profile you wish to connect to.

Merely repeat these actions to include all your social network accounts in the block.
- Provide Customers with Exclusive Coupon Codes
A discount coupon code motivates consumers to purchase from you once again. Because of that, you might wish to include a voucher code on your thank you page. You may use consumers a free shipping discount rate on their next purchase.

You can produce a voucher code with WooCommerce’s integrated discount coupon function or by utilizing a voucher code plugin.
After producing a discount coupon, merely include a Text block to the thank you page. You can then proceed and type the discount coupon into this block and any other messaging you wish to utilize.

This is a terrific start. However, you might wish to reveal various voucher codes to multiple clients. You might use novice consumers a tremendous portion discount rate on their next purchase to assist in constructing client commitment.
The best way to do this is by updating to FunnelKit Builder Pro. This premium plugin has an effective rules-based engine that enables you to reveal various discount coupons to consumers based on the overall order, product count, the WooCommerce payment entrance utilized, and more.
Release the Custom WooCommerce Thank You Page
When pleased with how the thank you page is established, click ‘Update’ to conserve your modifications. After that, click ‘Back To Thank You Page.’

You can now click the ‘Draft’ button beside the ‘Thank you Page’ and choose ‘Publish.’
This will make the thank you page survive on your WordPress site.

Approach 2. Develop a Custom WooCommerce Thank You Page Using a Page Builder
You can likewise develop a custom-made WooCommerce thank you page utilizing SeedProdThis enables you to create the page using a drag-and-drop editor, which is best if you discover the WordPress block editor too limiting or hard to use.
SeedProd includes more than 180 professionally designed design templates consisting of eCommerce design templates that you can use to develop sales and lead capture pages.
Even much better, SeedProd has complete assistance for WooCommerce and even features ready-made WooCommerce obstructs that you can drag onto your designs.
The first thing you must do is set up and trigger the plugin. For more information, see our detailed guide on how to set up a WordPress plugin.
Keep in mind: There is a complimentary variation of SeedProdhowever for this guide, we’ll utilize the Pro variation since it has the integrated WooCommerce obstructs we require. It likewise incorporates the e-mail marketing services you might use to promote your online shop.
Upon activation, go to SeedProd” Settings and enter your license secret.

You can discover this info under your account on the SeedProd site after getting in the license; click the ‘Verify Key’ button.
Pick a Thank You Page Template
Afterward, go to SeedProd” Landing Pages and click ‘Add New Landing Page.’

Next, you must pick a design template for your thank you page.
SeedProd’s design templates are arranged into various project types, such as coming quickly and 404 pages. Since you’re developing a customized WooCommerce, thank you page, proceed and click the ‘Thank You’ tab.

We’ll use the’Order Completed Thank You Page’ design template for this guide.
Just hover your mouse over this design template and click the checkmark icon.

Next, key in a name for your custom-made WooCommerce thanks you page. SeedProd will immediately utilize this name in its URL. However, you can modify the URL if you desire.
When you’re delighted with the info you’ve gotten in, click the ‘Save and Start Editing the Page’ button.

This loads the SeedProd editor, revealing a live sneak peek of the page to the right and some settings.
To tailor a block, click to pick it in the page home builder, then utilize the settings in the left-hand menu.

The left-hand menu likewise has blocked dragging onto the order verification design template.
Get More Sales By Adding an Upsell Section
You might have the ability to get more sales by promoting other items on the thank you page. One choice is to produce an upsell block utilizing SeedProd’s areas.
Areas are ready-made collections of blocks that are frequently utilized together, so they can assist you in producing beautifully-designed pages quickly.
Click the ‘Sections’ tab, and choose ‘Hero’ in the left-hand menu. After that, hover your mouse over ‘Hero 2’ and click the ‘+’ icon when it appears.

This includes the area of your page.
Proceed and click to choose the area’s ‘Image’ block. Click ‘Use Your Image’ in the left-hand menu to open the media library.
You can now include an image for the item you wish to upsell.
Once you’ve done that, click the ‘Headline’ block and enter the item title.

Next, click to choose the ‘Text’ block, and then enter the item description.
You can motivate clients to include this product in their basket by changing the placeholder call to action button with an ‘Add To Cart’ button.
To do this, click to choose the ‘Call To Action’ block and then click the ‘Delete Block’ icon.

Next, discover the ‘Add To Cart’ block in the menu.
Just drop this block onto the void in your Hero 2 area.

Now, it’s time to link this button to the best WooCommerce item.
To do this, you’ll require to understand the item’s ID. If you do not understand these details,n go to Products” All Products” in your WordPress control panel. Here, hover your mouse over the item to see its ID.

Back in the SeedProd page editor, click to choose the ‘Add To Cart’ block, and then include the ID in the ‘Product ID’ box.
You can likewise make the ‘Direct to Checkout’ slider possible so the buyer will go directly to your shop’s checkout.

You can now alter how the button looks by utilizing the settings in the left-hand menu. You can change its color plan, button text, positioning, and more.
After that, it’s an excellent concept to include a heading that promotes your upsell item. You might utilize something like ‘You might likewise be interested in’ or ‘This is the best addition to your order.’
Merely drag a ‘Headline’ block onto your design.

You can then key in the messaging you wish to utilize.
Promote Your Best-Selling WooCommerce Products
Another alternative is including popular items on thank your page. Given that these items are currently popular, there’s a likelihood the consumer might likewise wish to purchase them.
In the left-hand menu, discover the ‘Best Selling Products’ block and drag it onto your design.

You can include numerous other kinds of item grids, like sale items, premier items, current items, and more.
To learn more, see our guide on showing popular items in WooCommerce.
Release your Custom WooCommerce Thank You Page
When you’re delighted with how the WooCommerce thank you page looks, it’s time to release it by clicking the dropdown arrow beside ‘Save’ and choosing ‘Publish.’

After releasing the page, you must alter the WooCommerce settings so consumers get rerouted to your brand-new page.
The most convenient method to do this is by utilizing the Thanks Redirect for WooCommerce plugin. This plugin permits you to reroute clients to any URL after buying.
The first thing you must do is set up and trigger the plugin. For more information, see our detailed guide on how to set up a WordPress plugin.
Upon activation, you’ll require to go into the URL of your custom-made thank you page.
To get these details, go to SeedProd Landing Pages and discover the thank you page you produced. You’ll find its link in the ‘URL’ column.

As soon as you have this info, go to WooCommerce” Thanks Redirect
Here, inspect the ‘Enable Global Redirect’ box.

You can now type the link into the ‘Thanks Redirect URL’ box.
With that done, click ‘Save Changes’ to save your settings.

When they finish an order, WooCommerce will send consumers to your custom-made thank you page.
We hope this short article assisted you in producing custom-made WooCommerce thank you pages. You might wish to see our list of the best WooCommerce plugins for your shop and our guide on developing an e-mail newsletter.