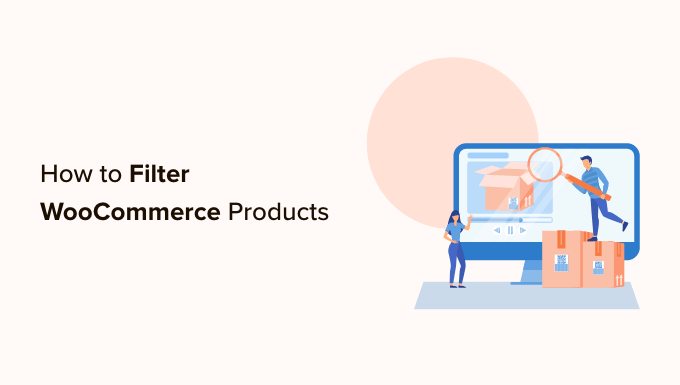
Are you searching for a method to filter items by quality in your WooCommerce shop?
Filtering your WooCommerce items by quality makes it much easier for clients to find the product they wish to acquire. It conserves clients’ time and makes the shopping experience more smooth.
This post will reveal how to utilize the WooCommerce filter by quality settings in your online shop.
Why Filter WooCommerce Products by Attribute?
Filters make it very simple for consumers to search for items in your WooCommerce shop.
They enable consumers to limit their search based on various qualities, including color, rate variety, material, size, and more. Instead of scrolling through your whole collection of items, users can merely search for the things they are interested in.

Including filters can assist in boosting user experience, enhancing search performance, and decreasing bounce rates in your online shop.
They can likewise increase sales by making it possible for clients to see all the readily available choices for the items they are interested in, assisting them in making more educated purchases.
That being stated, let’s see how you can quickly filter the items on your WooCommerce shop. We will reveal how to filter WooCommerce items by distinguishing custom-made characteristics.
- How to Filter WooCommerce Products by Attribute
- How to Filter WooCommerce Products by Custom Attribute
How to Filter WooCommerce Products by Attribute
This approach is for you if you are trying to find a fast and simple method to filter WooCommerce items. We will reveal how to establish an easy WooCommerce filter by characteristic settings.
You must set up and trigger the YITH WooCommerce Ajax Product Filter plugin. For more directions, please see our detailed guide on how to set up a WordPress plugin.
Remember: There is likewise a complimentary variation of the YITH WooCommerce Ajax Product Filter plugin. We will be utilizing the premium variation of the plugin for this tutorial.
Head to the YITH” Ajax Product Filter page from the WordPress admin sidebar upon activation.
Click the ‘+ Create a brand-new pre-programmed button to develop a pre-programmed filter.

When you exist, you can begin by typing a name for the filter into the ‘Preset name’ box.
The predetermined name will not be shown in your shop and is just there for your recommendation.

Next, select ‘Horizontal’ as the pre-programmed design, and then click the ‘+ Add a brand-new filter button’ at the bottom.
If you are utilizing the free variation of the plugin, then this choice will not be offered. Instead, you will have the ‘Default’ predetermined design.
You can now begin producing a filter for your WooCommerce items.

Develop a Filter for WooCommerce Products
It would be best to type a filter name next to the ‘Filter Name’ alternative.
If you are producing a filter that will assist clients in sorting through item classifications, then you can call it ‘Filter by Category.’
Next, you can pick the specifications for the filter from the ‘Filter for’ dropdown menu. The complimentary variation of the plugin uses filters for item classifications and tags.
For more information about the distinctions between these choices, please read our guide on including tags, qualities, and classifications in WooCommerce.
If you are developing a filter to sort items by various cost varieties, you must select the ‘Price Range’ alternative. If you desire to arrange things by appeal or typical score, you must pick the ‘Order by’ option.
You can likewise select the ‘Taxonomy’ alternative to filter item tags, classifications, colors, sizes, products, designs, and more. For this tutorial, we will be choosing this choice.

After you have done that, you need to pick from the taxonomy alternatives for the filter. Select that choice from the dropdown menu if you want to filter items by color.
As we develop a filter for item classifications, we will pick the ‘Product classifications’ choice.
Next, you must type all the item classifications on your site in the ‘Choose Terms’ area.

After that, you can select how you desire the filter to show on the front end of your shop from the ‘Filter type’ dropdown menu.
You can show the filter as a checkbox, dropdown menu, text, color examples, and more. For this tutorial, we will pick the ‘Select’ choice to include a dropdown menu.

Next, toggle the ‘Show Search Field’ switch to allow a search box within the dropdown menu.
You can likewise show the filter you are developing as a toggle by triggering the ‘Show as toggle’ switch. Consumers will be able to toggle the filter on and off.

When you have done that, pick a default order for the filtered terms from the ‘Order by’ dropdown menu. The filter classifications will be shown in the order that you like.
You can arrange the filter classifications utilizing the name, term count, or slug. You can likewise pick the ‘Order type’ for the filtered terms in the rising (ASC) or coming down (DESC) order.

Click the ‘Save Filter’ button at the bottom to conserve your filter.
Now, repeat the procedure to produce several filters.
After you have done that, return to the top and switch to the ‘General Settings’ tab to set up some settings.
Set Up the General Settings
You must begin by selecting a ‘Filter mode’ alternative. You can choose if you wish to use filters in real-time utilizing AJAX or to reveal an ‘Apply Filters’ button on your website.
Next, you must choose between revealing a conserve button or instantly showing filter outcomes.

When you have done that, pick if you wish to reveal the filter results on the very same page utilizing AJAX or if you wish to refill the outcomes on a brand-new page.
Next, you must scroll down to the ‘Hide empty terms’ choice and toggle the turn on if you do not wish to show open filter terms.
If you have included a ‘Mugs’ classification in your WooCommerce shop, however, it presently has no products, then it will not be shown in the ‘Filter by Category list.
Afterward, toggle the ‘Hide out of stock items’ switch if you do not wish to show out-of-stock items in the outcomes.

You can leave the other settings as default or configure them to your preference.
After making your options, click the ‘Save choices’ button to save your modifications and change to the ‘Customization’ tab at the top.
Set Up the Customization Settings (Premium Plugin Only)
Keep in mind: The ‘Customization’ tab will not be readily available if you are utilizing the free variation of the plugin.
From here, you can select your WooCommerce filter’s label design color, textual term color, color example size, filter location color, and more.
Including colors can assist your WooCommerce filter to look more visually pleasing and match your online shop’s branding.

Once you have made your options, click the ‘Save Options’ button and switch to the ‘SEO’ tab from the top.
Set Up the SEO Settings
Toggle the ‘Enable SEO alternative’ switch as soon as you exist to trigger the settings.
Now you can include meta tags from the dropdown menu to utilize on your filtered pages, and this will enhance the SEO of your website.
For more information, you might wish to read our post on WordPress metadata and meta tags.
You can instantly include the nofollow credit to all the filtered anchors by toggling on the ‘Add “nofollow” to filter anchors’ switch. This will inform online search engines not to use filter anchors when ranking your page.

When you are happy, click the ‘Save Options’ button to save the settings.
Include the WooCommerce Filter on the Products Page
To include the filters you have produced on your WooCommerce items page, you must change to the ‘Filter presets’ tab from the top.
When you exist, copy the shortcode of the pre-programmed filter you produced.

Next, open your WooCommerce items page in the block editor from the WordPress admin sidebar.
When you exist, click the Add Block ‘(+)’ button in the top left corner to discover the Shortcode block.
Now paste the filter predetermined shortcode you copied into the Shortcode block.

To conserve your modifications, click the ‘Publish’ or ‘Update’ button.
You can now visit your site to see the WooCommerce filter by quality function in action.
How to Filter WooCommerce Products by Custom Attribute
If you wish to develop a WooCommerce items filter utilizing custom-made characteristics, then this technique is for you.
Develop a Custom Attribute
Check out the Products” Attributes page from the WordPress admin sidebar to produce a customized quality.
Add a name and slug for the characteristic as soon as you exist.
If you desire to develop a filter for a particular item material, you can call the ‘Filter by Material’ characteristic.
Next, you must inspect the ‘Enable Archives’ box to show all the products that share that quality on a single page.

After that, click the ‘Add Attribute’ button at the bottom.
When the quality has been produced, click the ‘Configure Terms’ link to include terms to the quality.

This will direct you to a brand-new screen, where you should type a term into the ‘Name’ box.
If you developed a quality called ‘Filter by Material,’ you can include the specific products as terms, such as wool. You can consist of as numerous terms as you wish to a characteristic.
When you are done, click the ‘Add brand-new filter by Material’ button to conserve the term.

Include the Custom Attribute to a Product
After developing a characteristic, you must include it in personal WooCommerce items.
For this, you must open the item page you wish to modify. From here, scroll down to the ‘Product information’ area and switch to the ‘Attributes’ tab.
Next, merely open the ‘Custom Product Attribute’ dropdown menu and pick the custom-made characteristic you simply developed.
Now, proceed and click the ‘Add’ button.

Now that the customized quality has been included look for the term matching the item in the ‘Select Terms’ alternative.
If you produced a characteristic for a product and the item you are modifying is made of wool, then you must select ‘Wool’ from the dropdown menu.
When you are done, click the ‘Save characteristics’ button.

Next, click the ‘Update’ or ‘Publish’ button to conserve your modifications.
You will now need to duplicate the procedure for all the items that share the same quality.
Produce a Custom Attribute Filter Using a Plugin
Next, you must set up and trigger the YITH WooCommerce Ajax Product Filter plugin. For more directions, please see our guide on how to set up a WordPress plugin.
Remember: You can utilize the complimentary or premium variation of the plugin to produce a customized characteristic filter for WooCommerce.
Head to the YITH” Ajax Product Filter page from the WordPress admin sidebar upon activation.
From here, go on and click the ‘+ Create a brand-new pre-programmed button.
Next, you need to type a name for the predetermined that you are developing into the ‘Preset name’ box.
When you are done, click the ‘+ Add a brand-new filter button’ at the bottom to begin producing a WooCommerce custom-made quality filter.

Typing a name into the ‘Filter Name’ box would be best.
If you are developing a filter that will assist clients in sorting through various product choices, then you can call it ‘Filter for Material.’
Next, choose ‘Taxonomy’ from the ‘Filter for’ dropdown menu. If you are utilizing the complimentary variation of the plugin, this choice will be picked for you by default.

The custom-made characteristic you produced will currently be available in the dropdown menu beside the ‘Choose taxonomy’ alternative.
Proceed and select the customized quality from the dropdown list and type the characteristic terms into the ‘Choose terms’ box.

Next, you should pick how you desire the filter to be shown on the front end of your shop from the ‘Filter type’ dropdown menu.
The filter can be shown as a checkbox, dropdown menu, text, color examples, and more.
When you have done that, pick a default order for the filtered terms from the ‘Order by’ dropdown menu.
You can arrange the filter classifications utilizing the name, term count, or slug. You can choose the ‘Order type’ for the filtered terms in the rising (ASC) or coming down (DESC) order.
Click the ‘Save Filter’ button to conserve your custom-made quality filter.
Next, change to the ‘General Settings’ tab from the top. From here, you can select a filter mode, conceal empty terms, and set up other settings according to your requirements.
When you are done, click the ‘Save alternatives’ button to keep your modifications and change to the ‘Customization’ tab at the top.
Remember: The modification settings will not be readily available if you utilize the free variation.
From here, you can personalize how your predetermined filter will search your site’s front end.
You can select the label design color, textual term color, color example size, filter location color, and more.
After you have made your options, click the ‘Save Options’ button and switch to the ‘SEO’ tab from the top.
Toggle the ‘Enable SEO choice’ switch from here to trigger the settings.
You can include robotics meta tags from the dropdown menu to utilize on your filtered pages, and this will enhance the SEO of your website.
You can likewise toggle the ‘Add “nofollow” to filter anchors’ switch to include the nofollow credit to all filter anchors instantly.
When pleased, click the ‘Save Options’ button to save the settings.
Include the Custom Attribute Filter to a WooCommerce Products Page
To include the customized characteristic filter on a WooCommerce items page, you must change to the ‘Filter presets’ tab at the top.
From here, copy the shortcode of the custom-made characteristic filter.
Next, open your items page in the block editor from the WordPress admin sidebar.
Click the Add Block ‘(+)’ button in the top left corner to discover and include the Shortcode block.
After that, merely paste the filter pre-programmed shortcode that you copied into the block.
To conserve your modifications, click the ‘Publish’ or ‘Update’ button.
You can now visit your site to see the WooCommerce customized characteristic filter.

We hope this post assisted you in finding out how to filter WooCommerce items by the quality and custom-made quality. You might wish to see our short article on including fuzzy search to your site to enhance search engine results and our leading choices for the best WooCommerce styles.

Related Posts