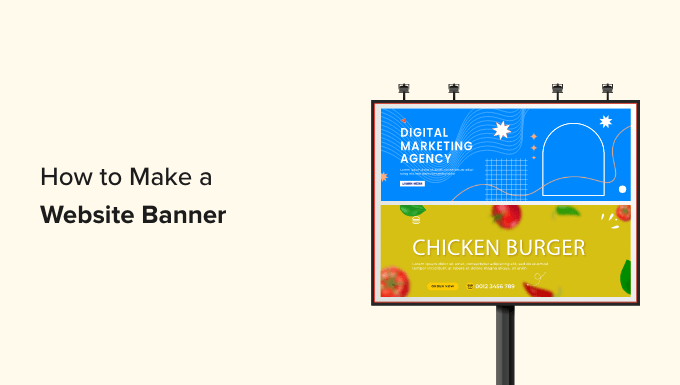
Are you searching for a simple way to make a WordPress site banner?
A banner can highlight the items, services, or news updates your site provides. It can increase user engagement, improve your click-through rate, and motivate visitors to act.
In this post, we will reveal you how to make a banner for your WordPress site quickly.
What Is a Website Banner?
A banner is a visual display screen that extends over the top, bottom, or side of a WordPress site. It frequently consists of a trademark name, logo design, and other visual components to promote a particular item, service, or occasion.
If an online shop has revealed a sale, then it can show a banner at the top of its pages to inform brand-new visitors about the promo and motivate them to make a purchase.

A properly designed banner can make a strong impression and welcome visitors to check out the rest of your website. Plus, banners can likewise be utilized to promote affiliate items, boost brand name awareness, construct an e-mail list by motivating visitors to register for your newsletter and drive traffic to other pages on your website.
You can likewise utilize banners to promote your social network accounts and motivate visitors to follow or like your pages.
What Is the very best Website Banner Size?
The perfect site banner size depends upon your WordPress blog site’s design and particular marketing objectives.
If you want to show a rectangle-shaped and thin banner at the top of the screen, you can utilize the Large Leaderboard size, which is 970 x 90.
A few of the other popular and most-used banner sizes consist of:
- Medium Banner: 300 x 250
- Leaderboard: 728 x 90
- Wide Skyscraper: 160 x 600
- Half-Page: 300 x 600
- Big Leaderboard: 970 x 90
- Signboard: 970 x 250
- Big Rectangle: 326 x 280
- Vertical Banner: 120 x 240
- Complete Banner: 468 x 60
- Half Banner: 234 x 60

If you wish to reveal a banner for an occasion in the sidebar, you can utilize the Wide Skyscraper or Half-Page banner sizes. You can likewise use the Medium banner size to show a square-shaped banner on your page.
If you want to show advertisement banners, you might wish to see our newbie’s guide on the highest-performing Google AdSense banner sizes and formats for WordPress.
Having stated that, let’s see how you can quickly make a banner on your WordPress site. For this tutorial, we will cover 3 techniques to make a banner, and you can utilize the links listed below to leap to the technique of your option:
- Approach 1: Make a Website Banner Using OptinMonster (Recommended)
- Approach 2: Make a Website Banner Using Canva (Free)
- Approach 3: Make a Website Banner Using Thrive Leads
Approach 1: Make a Website Banner Using OptinMonster (Recommended)
OptinMonster is the best WordPress banner plugin on the marketplace, enabling you to develop drifting bar and popup banners for your site quickly.
It is the best conversion optimization and list-building tool that assists you in turning site visitors into customers and consumers.
Plus, a lot of OptinMonster’s banner design templates have actually optin fields that enable you to gather the names, e-mail addresses, and telephone numbers of your site visitors.
Action 1: Install OptinMonster on Your Website
You will require to sign up for an OptinMonster account. To do this, check out the OptinMonster site and click the ‘Get OptinMonster Now’ button to establish an account.

After that, you need to set up and trigger the totally free OptinMonster plugin on your WordPress site. For in-depth guidelines, you might wish to see our newbie’s guide on how to set up a WordPress plugin.
The OptinMonster setup wizard will open in your WordPress admin panel upon activation.
From here, click the ‘Connect Your Existing Account’ button to link your WordPress website to your OptinMonster account.

This will open a brand-new window on your computer system screen.
From here, you need to click the ‘Connect to WordPress’ button to continue.

Action 2: Create and Customize Your Banner
Now that you have actually linked your WordPress account with OptinMonster head over to the OptinMonster” Campaigns page from the WordPress admin sidebar.
From here, you must click the ‘Create Your First Campaign’ button to develop your site banner style.

This will direct you to the ‘Templates’ page, where you can begin by selecting a project type.
You can select the’ Floating bar’ project if you want to reveal your banner as a bar at the top of the screen. You can choose the ‘Popup’ project type to show your banner as a popup.
After that, you will likewise require to choose a design template for the project you selected.

For this tutorial, we will select a design template for the ‘Floating bar’ project type.
Next, you will be asked to provide a name for the project that you are producing.
Just type the name of your option and click the ‘Start Building’ button to progress.

This will release the OptinMonster drag-and-drop user interface on your screen, where you can begin tailoring your banner. From here, you can drag and drop fields of your option from the sidebar on the left onto the flag.
If you desire to include social media icons to your banner to increase your fans, then you can drag and drop the Social Media obstruct from the left sidebar.

After that, simply click the block to open its settings in the left column.
From here, you can alter the button title, include your social network URL, and even change your social networks platform from the dropdown menu.
You can likewise include other blocks to show videos, images, text, or CTAs in your site banner style.

After that, you require to pick the position of your banner.
By default, the OptinMonster drifting bar is shown at the bottom of your site screen when you begin scrolling.
You can quickly alter this setting by clicking on the ‘Settings’ icon at the bottom of the sidebar.
This will open settings in the left column, where you must broaden the ‘Floating Bar Settings’ tab. From here, merely toggle the ‘Load Floating Bar at the top of the page?’ switch to show the banner at the top.

Action 3: Add Triggers for Your Banner
When you have created your banner, switch to the ‘Display Rules’ tab at the top. From here, you can include guidelines for your banner display screen.
Keep in mind that you require to change to this tab if you wish to include a particular screen trigger for your banner. Otherwise, you can avoid the following action.
If you want to reveal your banner when the user is about to leave your website, then you must pick the ‘Exit Intent’ alternative.

As soon as you have done that, simply choose the ‘On all gadgets’ choice from the dropdown menu in the middle. If you want to utilize this display screen guideline for mobile phones just, then you can likewise pick that alternative.
After that, select the Exit Intent Sensitivity according to your preference and click the ‘Next Step’ button.

This will take you to a brand-new screen. Here, you must make sure that the ‘Optin’ choice is chosen for the ‘Show the project view’ dropdown menu.
As soon as you have done that, merely click the ‘Next Step’ button.

Your screen guideline for the banner will now be revealed on the screen.
If you wish to alter something here, click the ‘Edit’ button to repair it.

Step 4: Publish Your Banner
You can now change to the ‘Publish’ tab on top and click the ‘Save’ button in the leading right corner of the screen.
After that, merely click the ‘Publish’ button to show the banner on your site.

Now visit your site to see the banner at the top of your screen.
This is what it appeared like on our demonstration website.

Technique 2: Make a Website Banner Using Canva (Free)
If you wish to free a site banner, this approach is for you.
Canva is a popular web-based tool that permits you to produce all sorts of graphics, consisting of banners, logo designs, posters, book covers, and more. It likewise provides a free variation that you can utilize to develop a site banner style.
Action 1: Create a Canva Account
You must check out the Canva site and click on the ‘Sign Up’ button to produce an account.
If you currently have a Canva account, then you can merely visit.

Upon account production, you will be required to your Canva account web page.
From here, you require to change to the ‘Templates’ tab from the left column and after that look for banner design templates utilizing the search box at the top.
This will show all the banner design templates readily available in Canva. Some of these design templates might be locked because they are paid functions.

Action 2: Design Your Website Banner
When you choose a design template, Canvas-style user interface will be released on the screen.
From here, you can personalize your banner design template according to your preference. You can alter the existing material in the design template by clicking the blocks and including your text.

You can even include various visual components like sticker labels, pictures, and videos by changing to the ‘Elements’ tab in the left column.
Upon including a component, you can, even more, alter its animation, position, and openness from the menu at the top.
You can submit media files from your computer system by changing to the ‘Uploads’ tab from the left column.

To include some text to your banner, change to the ‘Textbox’ tab from the column.
As soon as there, you can utilize default text designs or various font style mixes to include some material in your banner.
You can even include a call to action with a link by choosing the text utilizing your mouse. This will show a link icon at the top of the text.
Click that icon and copy and paste the link you wish to include.
After that, click the ‘Done’ button to wait.

Action 3: Get an Embed Code for the Banner
As soon as you enjoy your banner modification, click the ‘Share’ button in the top right corner of the screen.
This will open a timely menu where you must pick the ‘More’ alternative at the bottom.
This will take you to the ‘All Options’ menu, where you must pick the ‘Em bed’ alternative.
When you do that, a brand-new timely will open on the screen. From here, merely click the ‘Em bed’ button.

Canva will now produce an HTML embed code for you.
Once it’s shown on the screen, click the ‘Copy’ button under the ‘HTML embed code’ choice.

Step 4: Add the HTML Embed Code in WordPress
You can now show your banner on your WordPress page, post, or sidebar according to your preference. For this tutorial, we will reveal our banner on a WordPress page.
You must open the page or post where you want to include the banner.
As soon as there, click the ‘+’ button in the top left corner of the screen to discover and include the Custom HTML obstruct to the page.
As soon as you have done that, merely paste the embed code you copied into the block.

Click the ‘Update’ or ‘Publish’ button to conserve your modifications.
Now visit your site to see the WordPress banner in action.

Approach 3: Make a Website Banner Using Thrive Leads
You can likewise produce a site banner utilizing Prosper LeadsIt a popular WordPress popup plugin used by over 114,000+ sites.
With Thrive Leads, you can develop banners that will assist you in catching leads on your WordPress website and growing your e-mail list.
Action 1: Install Thrive Leads on Your WordPress Website
You need go to the Prosper Themes site and register for an account. When you have done that, head over to your member control panel.
Click the ‘Download and set up the Thrive Product Manager plugin’ link from here.

Next, you must visit your WordPress site to set up and trigger the Thrive Product Manager plugin. For in-depth directions, you might wish to see our detailed guide on how to set up a WordPress plugin.
Upon activation, head to the Item Manager tab from the WordPress admin control panel and click the ‘Log into my account’ button.

After entering your login qualifications, you can see your Thrive Product Manager control panel.
You can pick the items you wish to set up and utilize on your website. Select the ‘Thrive Leads’ plugin and click the ‘Install picked items’ button.

Action 2: Create a Website Banner
After the plugin setup, go to the Flourish control panel” Thrive Leads page from the WordPress admin sidebar.
When you exist, click the ‘Add New’ button beside the ‘Lead Groups’ alternative.

This will show the ‘Add New Lead Group’ popup on your screen, where you must type a name for the lead group you are producing.
Ensure to call the lead group in a manner that will assist you in determining it.
If you are developing a banner to develop your e-mail list, you can call your lead group ‘Email List Campaign’.

After that, the lead group you developed will be contributed to the screen. You need to click the ‘Add New Type Of Opt-In Form’ button from here.
This will open a brand-new timely where you need to pick the kind of banner you wish to develop.

You can produce a slide-in, ribbon, widget, in-content, lightbox, or scroll mat banner according to your taste.
These banners will resemble a kind as they will gather information from your users, consisting of e-mail addresses, telephone numbers, and more.
We will develop a ribbon banner for our website for this tutorial.

The timely will instantly vanish from the screen upon picking a site banner style type.
To open your lead group control panel, you need to click the ‘Add’ button in the ideal corner of your Lead Groups tab.

This will take you to your Lead Groups control panel, where all the types and lead reports for the group will be shown after your project goes live.
If you desire to develop a banner to catch e-mail addresses, then all the user info you gather through the flag will be shown here.

In the meantime, you need to click the ‘Create Form’ button to begin constructing your banner.
This will open a brand-new timely where you should supply a name for the type and click the ‘Create Form’ button.

When your kind has been developed, it will be shown in your Lead Groups control panel.
From here, you need to click the ‘Edit Design’ button in the best corner to begin constructing your banner.

Action 3: Customize Your Website Banner
The Thrive visual editor will now be released in a brand-new tab on your screen.
From here, you can begin by choosing a design template for your banner from the ‘Thrive Leads Library’ timely.
You can then utilize the pre-made design template as it is or tailor it with the visual editor. Upon making your option, click the ‘Choose Template’ button to move on.

After including a design template for a ribbon banner, you can quickly personalize its components by clicking everyone. This will open up the component’s settings in the sidebar on the.
If you desire to alter the button color in your design template, then you require to click on it to open its settings in the sidebar.

If you wish to include an entirely brand-new component to your banner, you can likewise do that by clicking the ‘+’ icon in the ideal corner of the screen.
This will open the ‘Add Elements’ sidebar on the right, where you can drag and drop components of your option onto the banner.
If you want to include social media account buttons to your banner, you must drag and drop the Social Follow aspect from the ideal sidebar.

When you enjoy your banner, click the ‘Save Work’ button in the bottom left corner to keep your modifications.
After that, you must go back to your Lead Groups control panel.

Step 4: Configure Banner Settings
When you are back in your control panel, you can alter the position of your banner by clicking the ‘Position’ alternative in the type row.
This will open the ‘Position Settings’ timely, where you can pick your favored banner position from the dropdown menu.
After that, click the ‘Save’ button.

Next, to set up the display screen frequency of the banner, click the ‘Display Frequency’ choice in the type row.
This will open the ‘Display Settings’ timely, where you can utilize the slider to determine the variety of times the banner must be shown on the screen.
If you keep the number 0, the banner will always be shown. Upon making your option, click the ‘Save’ button to keep your settings.

If you wish to include a particular trigger for your banner screen, you must click the ‘Trigger’ choice in the kind row.
This will show the ‘Trigger Settings’ timely, where you can pick a trigger for your banner from the dropdown menu, such as after a specific period or when a user reaches the bottom of the page.
When you are done, click the ‘Save’ button to conserve your settings.

Step 5: Publish Your Banner
After setting up the banner settings, you must leave your Lead Groups control panel and head back to the Thrive Leads control panel by clicking the link at the top.
When you exist, broaden your Lead Groups tab and toggle the ‘Display On Desktop’ switch to ‘On.’ If you wish to show your banner on mobile phones, you can toggle the ‘Display On Mobile’ switch to ‘On.’

After that, click the equipment icon in the top right corner of the Lead Groups tab to open the screen settings.
Here, you can choose the site pages you want the banner to be shown on. If you want the banner to reveal at the top of all the pages and posts, you can inspect the box next to these alternatives.
Click the ‘Save and Close’ button to conserve your modifications.

Now, you can visit your site to have a look at the banner shown at the top of the page.
This is what it appeared like on our demonstration site.

We hope this short article assisted you in discovering how to make a site banner for WordPress quickly. You might wish to see our novice’s guide on personalizing colors on your WordPress site and our leading choices for the best website design software application.